

Unsaved Changes Alert and Unsubmitted Data Preservation on Page Exit in React App
Show Unsaved Changes Alert and Preserve Unsubmitted Data like Facebook Using React and React Router Dom (v6)
Hello fellow developers,
Today, we're delving into a fascinating topic that you may have encountered while using Facebook. You might have noticed a popup while crafting a post - Changes you made may not be saved - when attempting to leave the page midway through your creative process. It's a feature that has caught our attention, and today, I'll show you how to implement this in your React project using React Router Dom V6.
Now, you might be thinking, "Isn't this simple to implement using the browser's beforeUnload event?" Well, the answer is a bit more complex. While it's indeed straightforward for multi-page applications, it's a different story when it comes to single-page applications. The beforeUnload event behaves seamlessly on the home page but doesn't play as nicely on other pages.
Additionally, React Router Dom v5 provides a few methods, such as Prompt and unsafe_navigationcontext, for implementing this feature. However, these approaches are not applicable in the latest version of React Router Dom(v6). In this version, there's no direct, out-of-the-box solution for our task.
My journey with this feature began when I encountered these very challenges. I decided to dig deeper, and it took me more than one week to delve into the depths of research. What I found not only solved the problem but also expanded my understanding of React and React Router Dom.
So, let's dive into this journey together.
What is this article all about?
This article is not like the so-called tutorial on the internet also this article is not similar to my other articles where I try to share my knowledge on different programming topics with you guys.
In this article I will go one step further I will cover the topic but in a storic way.
Basically, In this article, I am going to share my experience of doing research on this in-depth and what I have learned. it's like a demonstration of my journey of finding the best way to implement the feature.
I will take you through the whole journey how it began, how I got the minimal solution, What were its pros and cons, how I found better solutions, and lastly how I ended up my the journey by finding the solution that I was looking for.
Also, I will try to explain to you some tricky parts of the code so that you can understand what's going on and why things are going this way.
Since it's an article, I will try to bind myself just inside react and react-router dom without talking about multiple things in the same place. So that it feels much more relevant to you but at the same time I will try to cover all the things as much as possible to give you a taste of my one week journey.
So, be patient and read the whole article I believe you will learn lots of new things from this article.
But those who are in a hurry or only interested in the ultimate way to implement the feature can read the portion directly going to that part. Because I will cover three ways of making this feature and the first two ways are not recommended to use in your code.
Actually, these may work for you but when you have the better solution then why would take the least?
That's why you are most welcome to read only the ultimate solution from Using unstable_useBlocker from React Router Dom section skipping other portions.
Too much talk, now let's get started.
What do we intend to make?
First let's have a look at what exactly we are going to make, because, before starting the actual implementation we must have a proper idea of what we intend to make.
So, let's see a demonstration of the project we are going to make.
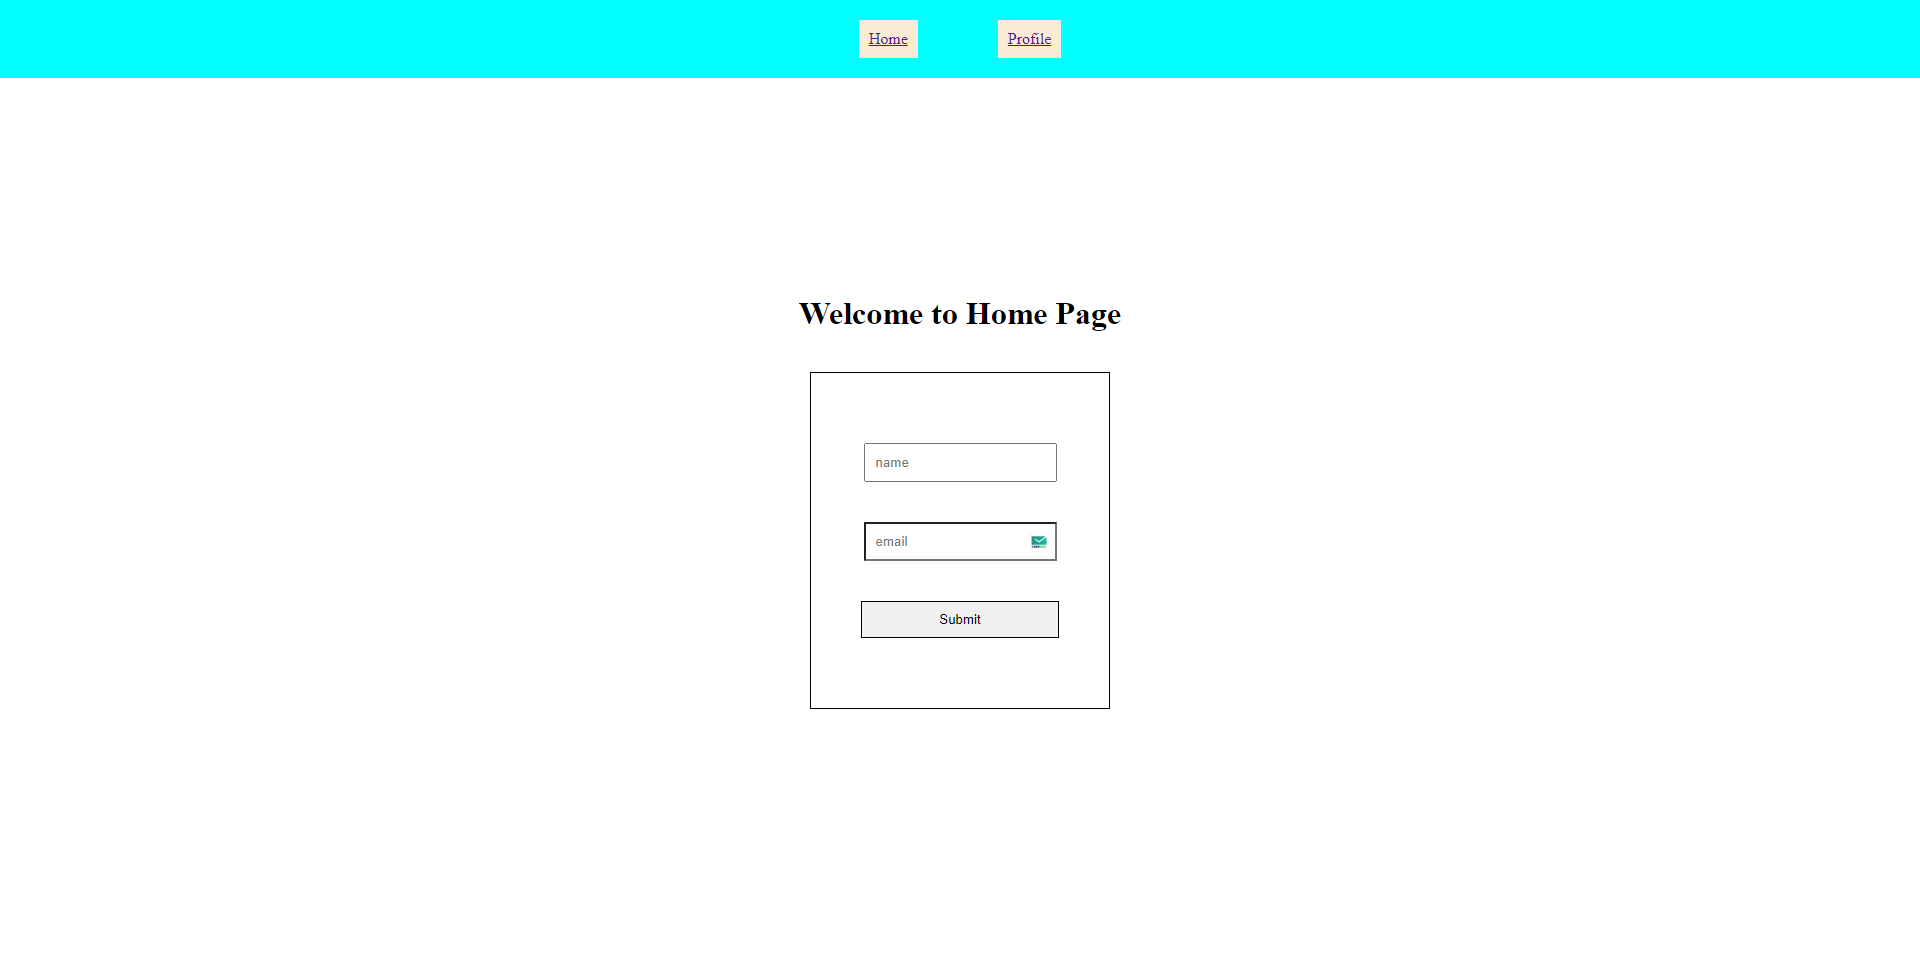
We will make a simple react app which will have simple and minimal two pages. The first one will be our home page and the second one will be a subroute or subpage name profile page. All these two pages will have a nav section on top of these pages and a form section at the center of these pages.
Here are the visualizations of these two pages.
Home page:
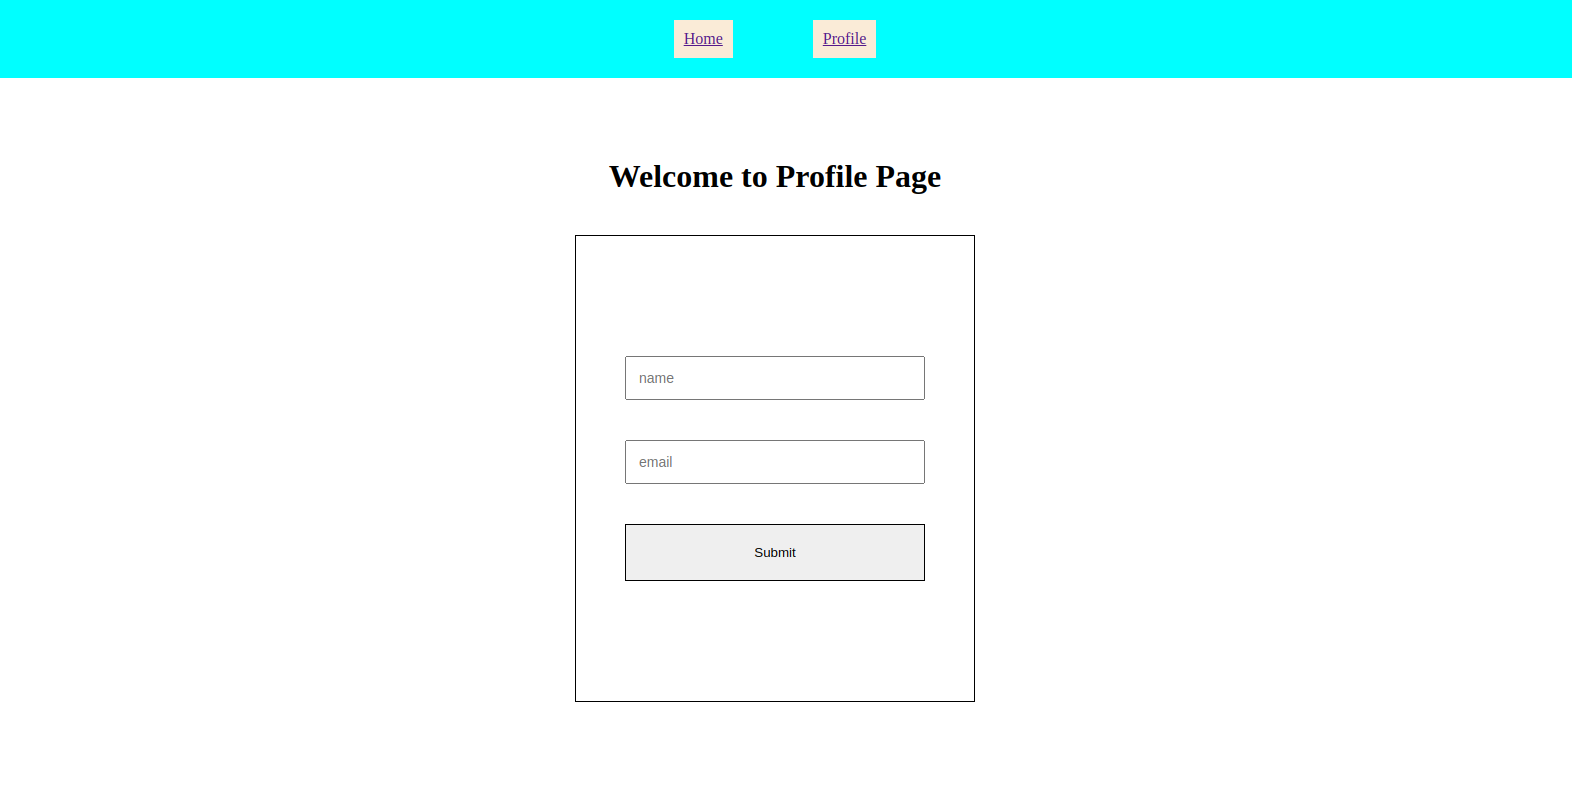
Profile page:
Now on these pages when we enter something on the form input and if we try to leave the page we will get a prompt like this one:
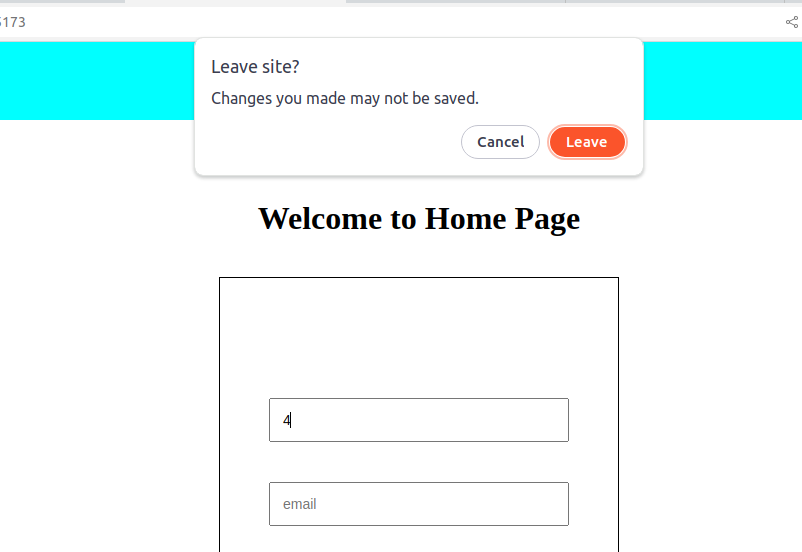
This prompt will be a little different for the profile page. But the main thing to consider is we will get a prompt like this instead of directly leaving the page. and if we select the cancel button this will keep us on this page and if we select the leave button this will leave the page.
Also when we get back to the page our typed data should be here as we had left it. For our scenario on the image on the top we are leaving the page with the value 4 for the first input field and when we get back to this page again this 4 should be here in the same input field.
We will build this functionality on both pages in our application because as I already mentioned the home route and other routes don't work in the same way in react router dom.
Here is the live link to this project:
link: https://prevent-unsaved-changes-page-leave.vercel.app/
Starter code to start implementation
To start with this article you will have to get the starter setup of the project that we are going to make. I have hosted all code inside this repo.
Just clone the repo running this command on your terminal
git clone https://github.com/robiulhr/prevent-unsaved-changes-page-leave.git
then open the project on the terminal and change the directory to starter_code directory
cd ./starter_code
and then install all dependencies of the project running this command:
npm install
inside the starter_code the folder structure will look like this after running the npm install
├── node_modules
├── src
   ├── component
   |  └── Form.jsx
   |  └── Nav.jsx
   ├── pages
   |  └── Home.jsx
   |  └── Profile.jsx
   ├── reducer
   |  └── formReducer.jsx
   ├── main.jsx
├── .gitignore
├── index.html
├── package-lock.json
├── package.json
├── README.md
├── style.css
├── vite.config.js
If everything is alright then start the project by running this command:
npm run dev
That's it you are ready to go with the rest article.
beforeunload event to prevent page leave from Home page
If you search on the internet about the ways of preventing page leave the way you will find most of the answers is by using beforeunload. This is the easiest and most widely used way of preventing page leave on a website.
So, let's try to implement this in our project.
replace the whole code of Home.jsx the file with this code:
// Home.jsx
import "../../style.css";
import Nav from "../component/Nav";
import Form from "../component/Form";
import { useEffect, useState, useReducer, useCallback } from "react";
import formReducer from "../reducer/formReducer";
function Home() {
  const [dirty, setDirty] = useState(false);
  const [formData, dispatch] = useReducer(formReducer, {
    name: "",
    email: "",
  });
  const beforeunloadHandler = useCallback(
    function (e) {
      if (dirty) {
        e.preventDefault();
        e.returnValue = "";
      }
    },
    [dirty]
  );

  useEffect(() => {
    window.addEventListener("beforeunload", beforeunloadHandler);
    return () => {
      window.removeEventListener("beforeunload", beforeunloadHandler);
    };
  }, [beforeunloadHandler]);
  return (
    <>
      <Nav />
      <main>
        <h1>Welcome to Home Page</h1>
        <Form formData={formData} setDirty={setDirty} dispatch={dispatch} />
      </main>
    </>
  );
}

export default Home;
And the whole code of Form.jsx file with this code:
export default function Form ({setDirty,formData, dispatch}) {
 function nameChangeHandler(e) {
    dispatch({ type: "change_name", name: e.target.value });
    setDirty(true)
  }
  function emailChangeHandler(e) {
    dispatch({ type: "change_email", email: e.target.value });
    setDirty(true)
  }

  return (
    <>
      <div className='form-wrapper'>
        <form>
          <div>
             <input onChange={nameChangeHandler} value={formData.name} type="text" placeholder="name" />
            <input onChange={emailChangeHandler} value={formData.email} type="email" placeholder="email" />
            <button type='submit'>Submit</button>
          </div>
        </form>
      </div>
    </>
  )
}
What are we doing here is that we have defined a state using the useState hook and we named it dirty. Then we are passing the setter function or state updater function setDirty to the form component. Depending on the dirty state value true or false we are adding the beforeunload event to the home page inside the useEffect hook which will run every time the dirty state gets updated.
Inside the Form page, we receive the setDirty function, after that, we use this function inside the nameChangeHandler and emailChangeHandler function so that it's the value of dirty state gets true when users write something on the form input fields.
Now run the project and write something on the home page from inputs.
then try to leave the page using the browser back button
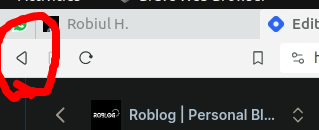
or manually typing on the URL bar
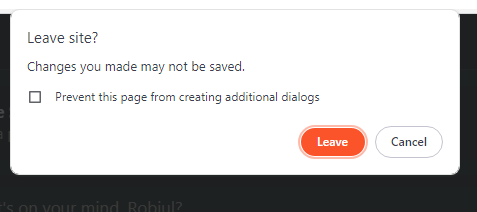
you won't be able to leave the page instead you will get a popup like this.
Even if you want to close the tab by clicking on the cross button
you won't be able to do that too.
Also if you want to reload the page you will get a similar kind of error.
So, at this point, we have been able to make the feature workable at some point. we haven't yet thought of links on the page which are in the nav section. Because at this point our app can't prevent page leave for clicking on these links.
We will work with these things in future sections but now our concern is whatever we have achieved at this point these should work on every page of our application.
So, let's check it for other routes of this application. In our case which is the Profile page.
beforeunload event to prevent page leave from subroutes
Now, to implement the same feature replace the existing code of the Profile.jsx page inside the pages directory with the code below:
// Profile.jsx
import "../../style.css";
import Nav from "../component/Nav";
import Form from "../component/Form";
import { useCallback, useEffect, useState, useReducer } from "react";
import formReducer from "../reducer/formReducer";

function Profile() {
  const [dirty, setDirty] = useState(false);
  const [formData, dispatch] = useReducer(formReducer, {
    name: "",
    email: "",
  });
  const beforeunloadHandler = useCallback(
    function (e) {
      if (dirty) {
        e.preventDefault();
        e.returnValue = "";
      }
    },
    [dirty]
  );

  useEffect(() => {
    window.addEventListener("beforeunload", beforeunloadHandler);
    return () => {
      window.removeEventListener("beforeunload", beforeunloadHandler);
    };
  }, [beforeunloadHandler]);

  return (
    <>
      <Nav />
      <main>
        <h1>Welcome to Profile Page</h1>
        <Form setDirty={setDirty} formData={formData} dispatch={dispatch} />
      </main>
    </>
  );
}

export default Profile;
Now run the application and you will see it's working as same as the home page.
But the problem is if we try to use the browser back button to navigate away, it won't work for the profile page as it does for the home page.
Not only that even if you navigate to the profile page from the home page and then come back to the home page using the navigation link which is on the nav bar instead of using the browser back button. And then try out the feature on the home page. You will face the same problem on the home page too.
And from here problems start...
Now the question begins that it was working fine for the home page when we entered the home page directly on an empty tab but why it's not working now and also why it's not working on the profile page or more specifically on subpages?
Why beforeunload doesn't work properly on subpages?
To answer this question first we have to understand how the web page navigation works how it differs in single-page applications also how beforeunload event fits on both multipage and single-page applications.
Let's start with very basic
When we browse the internet you type a URL or click a link, and a new web page loads in your browser. But what's happening behind the scenes?
When you enter a website, your web browser creates a record of this action in its history. This history is like an itinerary of your online journey. The initial entry into a website becomes the starting point in your browsing history. At this point, browser history doesn't have any previous record since you have started with a fresh empty tab.
Now, as you navigate through the website, each page or state you visit is added to your browser's history.
For every new page, a new entry is pushed into the browser's history. This entry contains information about the URL or location of the page you're visiting.
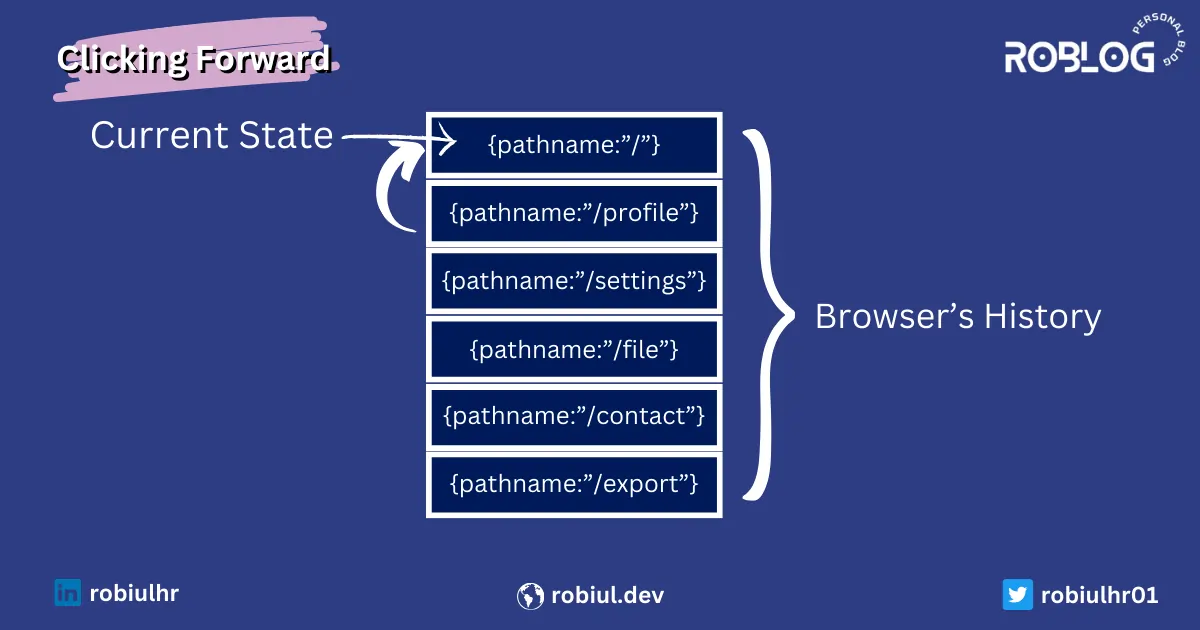
The Back and Forward buttons in your browser allow you to move between pages. Clicking Back retrieves the previous entry from the history and loads that page. Forward takes you to the next entry, effectively reversing the Back action.
Think of your browser's history as a stack or list of pages. Each new page visited is added to the top of the stack.
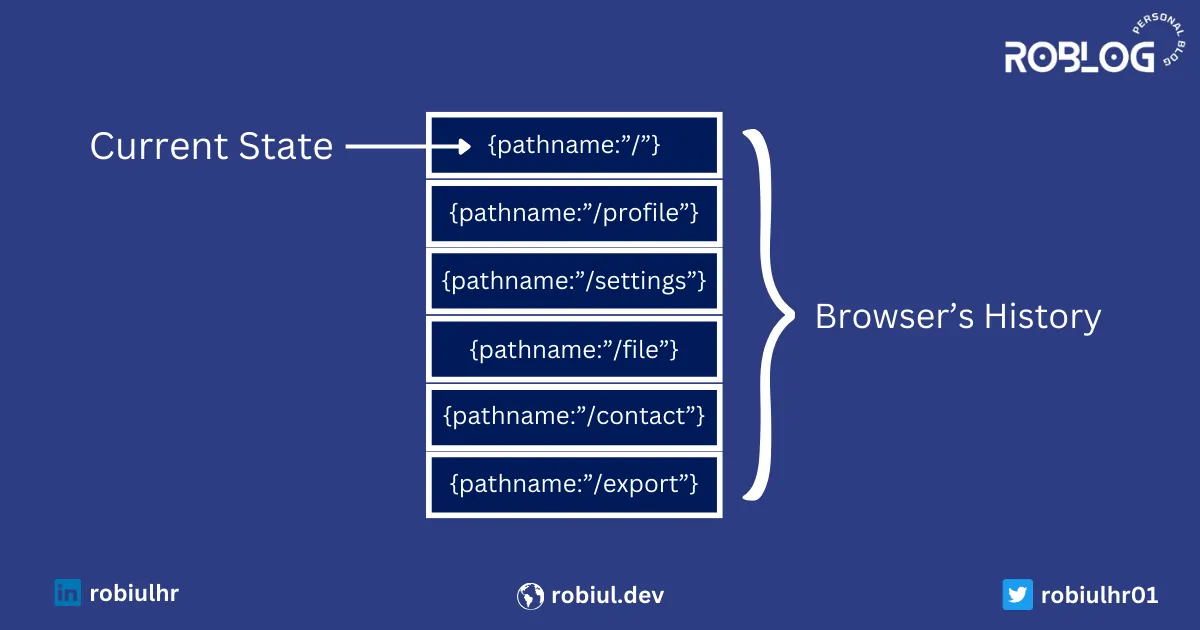
Clicking Back pops the top page off the stack, loading the previous one.
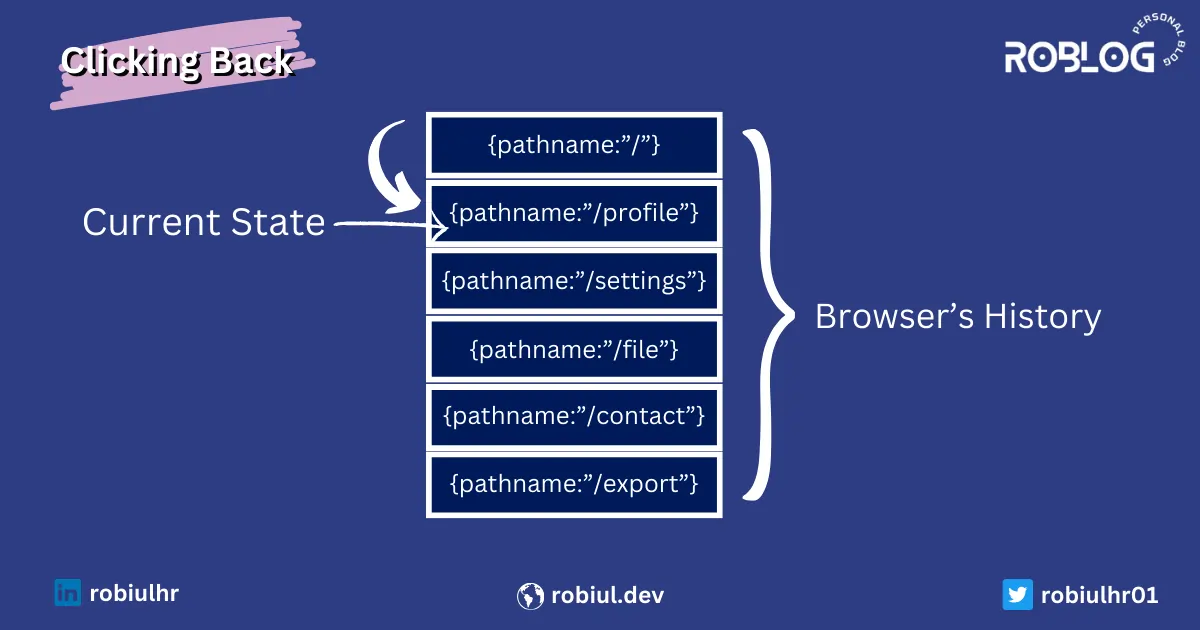
Forward takes you forward in the stack.
Note: Browser's history mechanism doesn't necessarily use a stack data structure in a straightforward sense, but its behavior is conceptually similar to a stack.
Now let's understand what is the role of beforeunload event on this journey.
beforeunload event fires when the page gets unloaded. as we can feel this thing with the name of this event. it's a pretty self-explanatory name beforeunload
The beforeunload event plays a vital role in this navigation process.
In the multipage application, every time a user tries to navigate to another page server renders a new page and since the browser renders a new page it's obvious it has unloaded the existing page and here the beforeunload event gets executed. that's why when users attempt to leave a page close a tab or navigate away from a page, the browser triggers the beforeunload event.
On the other hand single page application works that way in that it gets loaded when we first time visit the website and it gets unloaded when we leave the application. between these whenever we change routes browser does not unload anything. it's just making some API requests to get data and applying JavaScript to show this data. no new page is getting loaded. Since changing the route is not unloading anything that's why beforeunload event is not firing. That's the reason inside single page application beforeunload event doesn't work except on the home page.
And same thing happens for the home page if we are not in the first history state that means if we visit another page and come back to the home page by navigating from another page and trying to back to the previous page in that case the beforeunload event won't fire anymore.
In this scenario, our browser's history has some previous page to navigate and that's why it's not leaving the website or unloading anything here it's just navigating us to its previous route.
In a short word, the beforeunload event only fires when any page is getting unloaded. since when we first time visiting a website and then try to go back we are unloading the page here. this thing will work the same way even if we visit the profile directly from an empty tab instead of navigating from other pages to it. On the other hand, the home page beforeunload event won't fire if we navigate to it from another page instead of directly entering the home page in a new tab.
I believe you are now clear about why beforeunload event doesn't work for other routes or sub-pages
To make the explanation more realistic and put some weight on my words let's have a look at how Facebook handles this issue. That will make us more clear on that.
How does Facebook prevent users from leaving the page?
Let's visit Facebook's home page and try to see a demonstration of the feature that we are working on.
Create a new empty tab on your browser and visit Facebook typing facebook.com on the URL bar.
Make sure you are logged in and navigating to the home page https://www.facebook.com/
now click on the post creation section
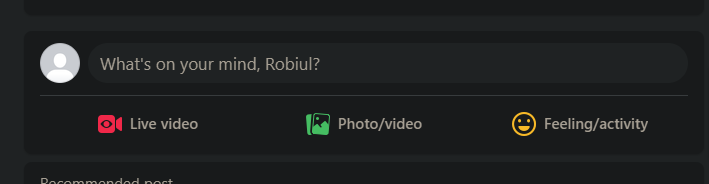
A popup will open to create a post. Write something random on the popup.
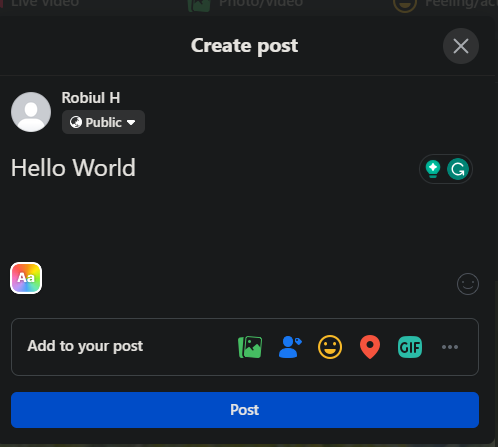
Now click on the browser back button without clicking anywhere else.
you will get an alert like this:
Now go to your profile page clicking on the profile button left side of the page.

And inside the profile page do the same as we did on the home page.
Here we will get an alert that looks like this:
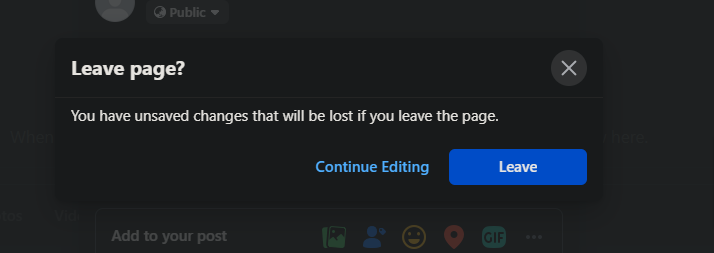
Did you notice that Facebook uses different alert popups to handle the same feature for different pages?
It's not like they intentionally doing this. Actually, they are using two different ways to handle these scenarios and that is why the alert popup is different. In the first scenario, they are using the beforeunload event and that's why the alert is the browser's default popup.
On the other hand in the second scenario, they are using a different approach and used their custom popup to show the alert and we will discuss this in brief in upcoming sections.
Also now if you come back to the home page of Facebook from the profile page by clicking the link instead of the browser back button and try the same thing that we tried before on the home page. You will see the custom alert of Facebook instead of the default alert we had seen before. Feel free to experiment with this too.
And I believe that makes my point clear that beforeunload event doesn't work the same way in other routes of single page application as it works for the home page.
now you may be thinking if that's the case how we can make this feature for other routes?
To do that there are a few ways. We will see them.
using the popstate event
The first approach we will use is using the popstate event.
This procedure involves several modifications and additions to our project's code. Please remain patient and carefully follow the provided instructions. This will solve all problems and also will implement the Unsubmitted Data Preservation using the browser's localStorage.
Upon completion, you'll witness the enchantment.
Set up the starter code again. Follow the instructions from
Starter code to start implementationsectionCreate a directory named
hooksfor custom hooks inside thesrcdirectory. Then inside thishooksdirectory create a file namedusePrompt.jsxPaste this code below to the
usePrompt.jsxfile:import { useEffect, useContext } from "react"; import { PopstateContext } from "../context/PopstateContext"; function usePrompt(dirty, popStateHandler) { let prevPopStateHandler = useContext(PopstateContext); useEffect(() => { if (dirty) { prevPopStateHandler.current && window.removeEventListener("popstate", prevPopStateHandler.current); prevPopStateHandler.current = popStateHandler; window.addEventListener("popstate", popStateHandler, false); } }, [dirty]); } export default usePrompt;This
usePrompthook is designed to manage the event listeners related to thepopstateevent, which is triggered when the user navigates through the browser history. It does this based on the condition of whether there are unsaved changes (dirty).Now Create a new file inside the
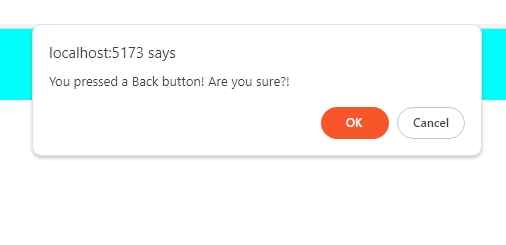
componentdirectory namedFormPrompt.jsxand paste this code inside the file:// FormPrompt.jsx import { useCallback, useContext } from "react"; import { useNavigate, useBeforeUnload, useLocation } from "react-router-dom"; import usePrompt from "../hooks/usePrompt"; import { PopstateContext } from "../context/PopstateContext"; export default function FormPrompt({ dirty, formData }) { let prevPopStateHandler = useContext(PopstateContext); const location = useLocation(); const navigate = useNavigate(); const currentRoute = window.location.pathname; const popStateHandler = useCallback( function (e) { // The popstate event is fired each time when the current history entry changes. const confirmValue = confirm("You pressed a Back button! Are you sure?!"); if (confirmValue) { prevPopStateHandler.current && window.removeEventListener("popstate", prevPopStateHandler.current); prevPopStateHandler.current = null; localStorage.setItem(location.pathname, JSON.stringify(formData)); return true; } else { // Stay on the current page. navigate(currentRoute); if (prevPopStateHandler.current) { window.removeEventListener("popstate", prevPopStateHandler.current); window.addEventListener("popstate", prevPopStateHandler.current, false); } return false; } }, [prevPopStateHandler.current] ); usePrompt(dirty, popStateHandler); useBeforeUnload( useCallback( (event) => { if (dirty) { event.preventDefault(); event.returnValue = ""; } }, [dirty] ), { capture: true } ); return null; }This code defines a React component (
FormPrompt) that uses hooks from React Router and custom hooks (useBeforeUnload,usePrompt). The component manages browser history events, prompts the user before leaving the page with unsaved changes, and handles form data persistence.Create another file within the
componentdirectory namedCustomLink.jsx.Paste the following code into it:
 import { useContext } from "react";
 import { Link, useLocation, useNavigate } from "react-router-dom";
 import { PopstateContext } from "../context/PopstateContext";
 export default function CustomLink({ children, ...props }) {
   const { onClick: passedClickHandler, to: path, formData, ...slicedProps } = props;
   const navigate = useNavigate();
   const prevPopStateHandler = useContext(PopstateContext);
   const location = useLocation();
   return (
     <Link
       onClick={(e) => {
         e.preventDefault();
         if (prevPopStateHandler.current) {
           let navigateTo;
           navigateTo = prevPopStateHandler.current();
           if (navigateTo) {
             navigate(path);
             prevPopStateHandler.current = null;
             localStorage.setItem(location.pathname, JSON.stringify(formData));
           }
         } else {
           navigate(path);
         }
         passedClickHandler?.(e);
       }}
       {...slicedProps}
     >
       {children}
     </Link>
   );
 }
This code establishes a custom link (
CustomLink) component similar to React Router DOM'sLinkcomponent. This custom link is necessary because the React Router DOM'sLinkcomponent doesn't provide a direct means to manage thepopstateevent. Since a custompopstateevent is in use, this custom link is created to manually trigger the event when a user clicks on a navigation link.To apply this
CustomLinkto our project we need to modify the Nav bar's code.replace the code of
Nav.jsxwith this code below:import CustomLink from "./CustomLink"; export default function Nav({formData}) { return ( <nav> <CustomLink formData={formData} to={"/"}>Home</CustomLink> <CustomLink formData={formData} to={"/profile"}>Profile</CustomLink> </nav> ); }Create another directory named
contextwithin thesrcdirectory, and within it, generate a file namedPopstateContext.jsx. Copy and paste the ensuing code intoPopstateContext.jsx:paste this code inside the
PopstateContext.jsxfile:import { createContext, useRef } from 'react' export const PopstateContext = createContext(null) export default function PopstateProvider ({ children }) { const prevPopStateHandler = useRef(null) return ( <PopstateContext.Provider value={prevPopStateHandler}> {children} </PopstateContext.Provider> ) }This code initiates a context to store the
popstateevent reference, making it globally accessible throughout the application. This is vital for dynamically managing the addition and removal of thepopstateevent across the entire project as per specific requirements.To add this context to the app replace the
main.jsxfileimport React from "react"; import ReactDOM from "react-dom/client"; import Home from "./pages/Home"; import Profile from "./pages/Profile.jsx"; import FormContextProvider from "./context/PopstateContext"; import { createBrowserRouter, RouterProvider } from "react-router-dom"; const router = createBrowserRouter([ { path: "/", element: <Home />, }, { path: "/profile", element: <Profile />, }, ]); ReactDOM.createRoot(document.getElementById("root")).render( // <React.StrictMode> <FormContextProvider> <RouterProvider router={router} /> </FormContextProvider> // </React.StrictMode> );Create another custom hook inside the
hooksdirectory nameduseFormData.jsximport { useEffect, useContext } from "react"; import { useLocation } from "react-router-dom"; import { PopstateContext } from "../context/PopstateContext"; export default function useFormData(formData, setDirty, dispatch) { const prevPopStateHandler = useContext(PopstateContext); const location = useLocation(); // restore the saved data from local storage useEffect(() => { const prevData = JSON.parse(localStorage.getItem(location.pathname)); if (prevData) { dispatch({ type: "restore", data: prevData }); localStorage.removeItem(location.pathname); } }, []); // mark the form as dirty if there is form value otherwise mark as not dirty useEffect(() => { if (formData.name === "" && formData.email === "") { setDirty(false); prevPopStateHandler.current && window.removeEventListener("popstate", prevPopStateHandler.current); prevPopStateHandler.current = null; } else setDirty(true); }, [formData]); }This hook manages the form data within
localStoragewhen the user visits the page, and it also handles thepopstateevent based on changes informData.
Now if we add this FormPrompt component and the useFormData hook inside the project's pages these will solve all the issues that we were facing.
Let's try it now on the profile page:
import { useReducer, useState } from "react";
import "../../style.css";
import Nav from "../component/Nav";
import Form from "../component/Form";
import FormPrompt from "../component/FormPrompt";
import formReducer from "../reducer/formReducer";
import useFormData from "../hooks/useFormData";
function Profile() {
  const [dirty, setDirty] = useState(false);
  const [formData, dispatch] = useReducer(formReducer, {
    name: "",
    email: "",
  });
  useFormData(formData, setDirty, dispatch);
  return (
    <>
      <FormPrompt dirty={dirty} formData={formData} />
      <Nav formData={formData} />
      <main>
        <h1>Welcome to Profile Page</h1>
        <Form formData={formData} dispatch={dispatch} />
      </main>
    </>
  );
}

export default Profile;
Now run the app and check the feature. This code will do the same for the rest things but we won't see the issues that we were encountering before and preserve the data on localStorage:
Now let's apply the same for the Home page. replace the Home.jsx file code with this code below:
import { useReducer, useState } from "react";
import "../../style.css";
import Nav from "../component/Nav";
import Form from "../component/Form";
import FormPrompt from "../component/FormPrompt";
import formReducer from "../reducer/formReducer";
import useFormData from "../hooks/useFormData";
function Home() {
  const [dirty, setDirty] = useState(false);
  const [formData, dispatch] = useReducer(formReducer, {
    name: "",
    email: "",
  });
  useFormData(formData, setDirty, dispatch);
  return (
    <>
      <FormPrompt dirty={dirty} formData={formData} />
      <Nav formData={formData} />
      <main>
        <h1>Welcome to Home Page</h1>
        <Form formData={formData} dispatch={dispatch} />
      </main>
    </>
  );
}

export default Home;
Now run the application again, now both the home and profile pages should solve the issues and also preserve the data on localStorage
using the history npm package
In the previous section, we have seen how can we make the feature workable for all situations using popstate event But there is another way that we can use without using popstate event.
Here we will use a npm package name history this is a very popular and widely used package and even React router dom also use this package behind the scene. So, you can imagine how popular and authentic this package is.
And the interesting thing is we don't need to start from the beginning to do that. whatever code we have written so far few of them are still relevant also the folder structure will be totally the same. We just need to make some changes to a few files.
First of all, let's install the package in our code:
npm install historyNow replace the
usePromp.jsxfile code with this code:import { useEffect, useContext } from "react"; import { NavigationRef } from "../context/NavigationRefContext"; import { createBrowserHistory } from "history"; export default function usePrompt(dirty,formData, locationChangeHandler) { let { unblockNavigationRef, blockHandlerRef } = useContext(NavigationRef); const history = createBrowserHistory(); useEffect(() => { if (dirty) { if (unblockNavigationRef.current) unblockNavigationRef.current(); unblockNavigationRef.current = history.listen(locationChangeHandler); blockHandlerRef.current = locationChangeHandler; } }, [dirty, formData]); }Then replace the
useFormData.jsxfile code:import { useEffect } from "react"; import { useLocation } from "react-router-dom"; export default function useFormData(formData, setDirty, dispatch) { const location = useLocation(); // restore the saved data from local storage useEffect(() => { const prevData = localStorage.getItem(location.pathname); if (prevData && prevData !== "undefined") { const parsedData = JSON.parse(prevData); dispatch({ type: "restore", data: parsedData }); localStorage.removeItem(location.pathname); } }, []); // mark the form as dirty if there is form value otherwise mark as not dirty useEffect(() => { if (formData.name !== "" || formData.email !== "") { setDirty(true); } }, [formData]); }Then replace the
FormPrompt.jsxfile code with this code:// FormPrompt.jsx import { useCallback, useContext, useEffect } from "react"; import { useNavigate, useBeforeUnload, useLocation } from "react-router-dom"; import usePrompt from "../hooks/usePrompt"; import { NavigationRef } from "../context/NavigationRefContext"; export default function FormPrompt({ dirty, formData }) { let { unblockNavigationRef, blockHandlerRef } = useContext(NavigationRef); const location = useLocation(); const navigate = useNavigate(); const currentRoute = location.pathname; const locationChangeHandler = useCallback( function (transition) { if (transition.action === "POP") { const confirmValue = confirm("are you sure?"); if (confirmValue) { unblockNavigationRef.current?.(); unblockNavigationRef.current = null; blockHandlerRef.current = null; localStorage.setItem(currentRoute, JSON.stringify(formData)); return true; } else { localStorage.setItem(currentRoute, JSON.stringify(formData)); navigate(currentRoute); return false; } } }, [formData, unblockNavigationRef.current, blockHandlerRef.current] ); usePrompt(dirty, formData, locationChangeHandler); useBeforeUnload( useCallback( (event) => { if (dirty) { event.preventDefault(); event.returnValue = ""; } }, [dirty] ), { capture: true } ); return null; }Replace the
CustomLink.jsxfile code:import { useContext } from "react"; import { Link, useLocation, useNavigate } from "react-router-dom"; import { NavigationRef } from "../context/NavigationRefContext"; export default function CustomLink({ children, ...props }) { const { onClick: passedClickHandler, to: path, formData, ...slicedProps } = props; const navigate = useNavigate(); const { unblockNavigationRef, blockHandlerRef } = useContext(NavigationRef); const location = useLocation(); return ( <Link onClick={(e) => { e.preventDefault(); if (unblockNavigationRef.current && blockHandlerRef.current) { const confirmed = confirm("are you sure?"); if (confirmed) { navigate(path); unblockNavigationRef.current(); unblockNavigationRef.current = null; blockHandlerRef.current = null; localStorage.setItem(location.pathname, JSON.stringify(formData)); } } else { navigate(path); } passedClickHandler?.(e); }} {...slicedProps} > {children} </Link> ); }Inside the
contextfolder rename thePopstateContext.jsxfile toNavigationRefContext.jsxand replace the code inside it:import { createContext, useRef } from 'react' export const NavigationRef = createContext(null) export default function NavigationRefProvider ({ children }) { const unblockNavigationRef = useRef(null) const blockHandlerRef = useRef(null) return ( <NavigationRef.Provider value={{unblockNavigationRef,blockHandlerRef}}> {children} </NavigationRef.Provider> ) }Inside the
main.jsxfile, update the context file path// remove this line import FormContextProvider from "./context/PopstateContext"; // add this line import FormContextProvider from "./context/NavigationRefContext.jsx";
We don't need to do anything new for the pages the setup we did before is still applicable.
Now run the application and you will see that your application is working as it was before.
Note: These two ways work well but these are not good enough to rely on also there are situations where they may won't work properly so I don't recommend using these on your project.
But you can explore these ways just for fun and enrich your knowledge.
Using unstable_useBlocker from React Router Dom
Now the way I am going to discuss is the ultimate solution that I have found to make this feature in a much easier way.
Note: The solution I am talking about is not authorized by the authority or not recommended by the industry standard but it can make the work done properly.
Also, this
unstable_useBlockeris not documented in the documentation but it exists on the react router dom source code.
To apply this way we need to start from the beginning which means from the starter code I have provided. Because this way is much easier to implement in comparison to the other two ways we have discussed before. Much code is irrelevant now.
so it's better to start from the beginning. Also, this will help to follow the section even if are just reading this section instead of reading the whole article.
Set up the starter code again. Follow the instructions from
Starter code to start implementationsectionCreate a directory named
hooksfor custom hooks inside thesrcdirectory. Then inside thishooksdirectory create a file namedusePrompt.jsxPaste this code below to the
usePrompt.jsxfile:import { useEffect, useRef } from "react"; import { unstable_useBlocker as useBlocker } from "react-router-dom"; function usePrompt(onLocationChange, hasUnsavedChanges) { const blocker = useBlocker(hasUnsavedChanges ? onLocationChange : false); const prevState = useRef(blocker.state); useEffect(() => { if (blocker.state === "blocked") { blocker.reset(); } prevState.current = blocker.state; }, [blocker]); } export default usePrompt;This
usePrompthook is designed to manage the blocking behavior during navigation changes based on whether there are unsaved changes in the application. This hook plays a similar role as theusePrompthooks we used in the previous two ways but it uses theunstable_useBlockerinstead ofpopstateevent orhistorynpm package.Now Create a new file inside the
componentdirectory namedFormPrompt.jsxand paste this code inside the file:import { useCallback } from "react"; import { useBeforeUnload, useLocation } from "react-router-dom"; import usePrompt from "../hooks/usePrompt"; const stepLinks = ["/", "/profile"]; const FormPrompt = ({ dirty, formData }) => { const location = useLocation(); const onLocationChange = useCallback( ({ nextLocation }) => { let confirmValue = false; if (stepLinks.includes(nextLocation.pathname) && dirty) { confirmValue = !window.confirm("You have unsaved changes, are you sure you want to leave?"); } if (!confirmValue) localStorage.setItem(location.pathname, JSON.stringify(formData)); return confirmValue; }, [dirty, formData] ); usePrompt(onLocationChange, dirty); useBeforeUnload( useCallback( (event) => { if (dirty) { event.preventDefault(); event.returnValue = ""; } }, [dirty] ), { capture: true } ); return null; }; export default FormPrompt;This
FormPromptcomponent manages navigation prompts and handles unsaved changes during navigation events, offering a confirmation dialog to users.Create another custom hook inside the hooks directory named
useFormData.jsxand paste this code:import { useEffect } from "react"; import { useLocation } from "react-router-dom"; export default function useFormData(formData, setDirty, dispatch) { const location = useLocation(); // restore the saved data from local storage useEffect(() => { const prevData = JSON.parse(localStorage.getItem(location.pathname)); if (prevData) { dispatch({ type: "restore", data: prevData }); localStorage.removeItem(location.pathname); } }, []); // mark the form as dirty if there is form value otherwise mark as not dirty useEffect(() => { if (formData.name === "" && formData.email === "") { setDirty(false); } else setDirty(true); }, [formData]); }This
useFormDatahook manages the form data, restores it from localStorage when the user visits the page, and tracks changes to mark the form as dirty or not dirty accordingly.
Now we are done with the feature implementation let's apply it to the project's pages.
Replace the
Home.jsxfile's code:import { useReducer, useState } from "react"; import "../../style.css"; import Nav from "../component/Nav"; import Form from "../component/Form"; import FormPrompt from "../component/FormPrompt"; import useFormData from "../hooks/useFormData"; import formReducer from "../reducer/formReducer"; function Home() { const [dirty, setDirty] = useState(false); const [formData, dispatch] = useReducer(formReducer, { name: "", email: "", }); useFormData(formData, setDirty, dispatch); return ( <> <FormPrompt formData={formData} dirty={dirty} /> <Nav /> <main> <h1>Welcome to Home Page</h1> <Form formData={formData} dispatch={dispatch} /> </main> </> ); } export default Home;Replace the
Profile.jsxfile's code:import { useReducer, useState } from "react"; import "../../style.css"; import Nav from "../component/Nav"; import Form from "../component/Form"; import FormPrompt from "../component/FormPrompt"; import useFormData from "../hooks/useFormData"; import formReducer from "../reducer/formReducer"; function Profile() { const [dirty, setDirty] = useState(false); const [formData, dispatch] = useReducer(formReducer, { name: "", email: "", }); useFormData(formData, setDirty, dispatch); return ( <> <FormPrompt formData={formData} dirty={dirty} /> <Nav /> <main> <h1>Welcome to Profile Page</h1> <Form formData={formData} dispatch={dispatch} /> </main> </> ); } export default Profile;
Now run the application again and see the magic.
Conclusion
Alerts for Unsaved Changes and Unsubmitted Data Preservation are not commonly implemented features. You might not encounter many situations where you'll need to incorporate these into your application. but these are cool features to know as a developer.
I started playing around with these as an experiment, and it turned into a fun learning experience.
The motive behind sharing this article is to pass on the enthusiasm and knowledge I gathered while working on these unique features. I hope you had a similar experience. Feel free to express your thoughts in the comments, and if you have any questions, don't hesitate to ask.
All the code of this article you will find in this GitHub repo
Happy coding :)

![Cannot redeclare block-scoped variable in TypeScript [Fixed]](/_next/image?url=https%3A%2F%2Fcdn.hashnode.com%2Fres%2Fhashnode%2Fimage%2Fupload%2Fv1701462077875%2Fedc24eaf-2ef6-4ed3-b33f-ab15d254a02f.webp&w=3840&q=75)