

Deploy Vite React App on Both GitHub Pages and Vercel
Explore Step-by-Step Deployment: Simultaneously Deploy Your Vite React App on GitHub Pages and Vercel
Search for a command to run...
Explore Step-by-Step Deployment: Simultaneously Deploy Your Vite React App on GitHub Pages and Vercel
process is now removed from vite also in vite config we cant access env direct, instead we have to use loadENV from vite, like below:-
import { defineConfig, loadEnv } from 'vite';
export default defineConfig(({ mode }) => {
const env = loadEnv(mode, '.', 'VITE_');
return {
base: env.VITE_BASE_PATH || "/your-repo-name",
// Other Vite configurations
};
});

Welcome to your journey with PM2, the powerful process manager for Node.js applications. Whether you're a beginner just starting with Node.js or an experienced developer looking to optimize your application management, this guide will walk you throug...
Cloudinary has long been a robust solution for managing assets like images and videos in web applications. Its features allow for smooth asset management and optimization, but they stepped up their game to accommodate Next.js with a dedicated library...

As a developer, we often encounter error messages that can be perplexing. One such common Git error is "fatal: not possible to fast-forward, aborting." In this article, we will dive into this error and try to understand what this error is all about, ...
In TypeScript, developers often run into the "Cannot redeclare block-scoped variable" error. This issue arises primarily from two reasons: Variable Redeclaration in the Same Block Scope: When you attempt to declare a variable with the same name agai...
![Cannot redeclare block-scoped variable in TypeScript [Fixed]](/_next/image?url=https%3A%2F%2Fcdn.hashnode.com%2Fres%2Fhashnode%2Fimage%2Fupload%2Fv1701462077875%2Fedc24eaf-2ef6-4ed3-b33f-ab15d254a02f.webp&w=3840&q=75)
Show Unsaved Changes Alert and Preserve Unsubmitted Data like Facebook Using React and React Router Dom (v6)
On this page
Hey developers, hope you're doing great!
Have you ever wondered about deploying your React project on both GitHub Pages and Vercel simultaneously? Well, it's not just possible; it's super simple!
Now, you might be thinking, 'Why would I do that?'
Let's be real; in most cases, you won't deploy the same project on different servers. But, here's the twist. I've noticed something among beginner developers who showcase their practical projects on GitHub Pages or Vercel for their portfolio. Often, the shared link doesn't work smoothly, creating a not-so-great impression. Imagine having a backup deployment on another platform! It's a solution to avoid those awkward moments.
So, I'm here to guide you through deploying on both GitHub Pages and Vercel. It's not just a tech hack, it's an exploration! Join me, and let's dive in together.
Are you ready for the journey?
Note: While there are multiple methods to create a React app, for the purpose of this guide, we'll be considering a React project using Vite, known for its speed and simplicity, which offers an efficient front-end build process. Although other approaches exist, we've chosen Vite for its ease of use. And for the routing, I am using react router dom.
All the code for this article is available on this GitHub repository. Feel free to check it out for a better understanding. Additionally, it can be used as a convenient template for kickstarting your React projects with GitHub Pages and Vercel. Feel free to fork, and utilize the code to enhance your development workflow.
Begin by configuring the base URL in the vite.config.js file. This step is crucial because GitHub Pages uses a subdirectory-like URL structure for Project Pages. When hosted on GitHub Pages, a project is accessible at a link resembling <ROOT>/project-name/.
Define the base URL to match the project name to avoid errors and ensure your project can locate its assets correctly.
This is how the links should look like:
 ❌ Bad
 https://robiulhr.github.io/assets/favicon.17e50649.svg
 ✅ Good
 https://robiulhr.github.io/deploy_react_app_github_pages_vercel/assets/favicon.17e50649.svg
Update the vite.config.js file accordingly. Here project name is the name of our repository which means use the repo name as the base URL.
base: "/deploy_react_app_github_pages_vercel";
after adding the base URL the vite.config.js file will look like this:

Add a homepage field to your project’s package.json:
"homepage": "https://username.github.io/repo_name"
Replace username with your GitHub username and repo_name with your repository’s name.
Install gh-pages in your project:
npm install --save gh-pages
Modify your package.json scripts by adding these two scripts below:
 "scripts": {
    "predeploy": "npm run build",
    "deploy": "gh-pages -d dist",
  }
predeploy ensures the latest build is ready before deployment, and deploy triggers the deployment process.
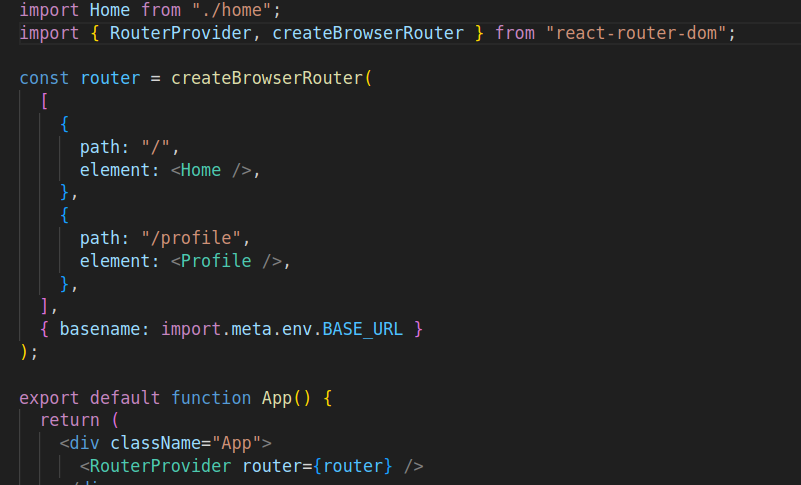
Since we've included the base URL in the vite.config.js file as the repo name for deployment, we need to make adjustments in our React Router DOM setup. In your project's router setup, locate the part where you create the router using createBrowserRouter.
As the second parameter of the createBrowserRouter method, add the following code:
const router = createBrowserRouter(routes, { basename: import.meta.env.BASE_URL });
This line ensures that React Router DOM correctly handles the new base URL configuration.
Execute the following command to deploy your application:
npm run deploy
This command creates a new branch named gh-pages in your GitHub repository.
Set the source branch to gh-pages in the GitHub Pages section of your repository’s settings.
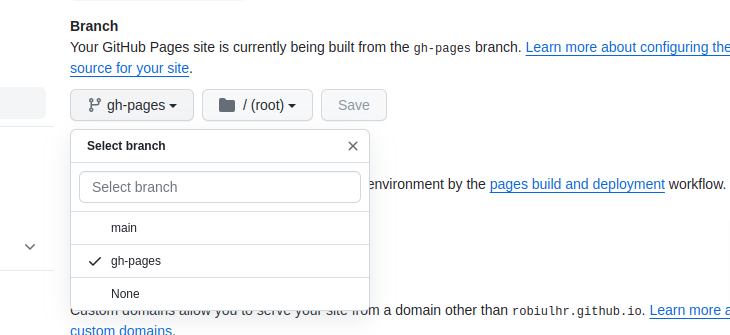
Navigate to Settings > Pages to find the link to your deployed site.
Manually deploying your project to GitHub Pages works, but wouldn't it be convenient if this process happened automatically with every push to the main branch?
GitHub Actions makes this automation easy. You can create workflows that specify the steps to build and deploy your React app whenever changes are pushed to the specified branch.
GitHub Actions work by defining workflows using YAML files in a .github/workflows directory in your repository. These workflows contain a set of jobs and steps that GitHub will run in response to events, such as pushes, pull requests, or manual triggers.
In your project repository, create a new folder named .github/workflows if it doesn't exist. Inside the workflows folder, create a new file named deploy.yml. This file will define your GitHub Actions workflow.
Paste the following YAML content into deploy.yml:
 name: Deploy

 on:
   push:
     branches:
       - main

 jobs:
   build:
     name: Build
     runs-on: ubuntu-latest

     strategy:
       matrix:
         node-version: [16.x] # Specify the Node.js version you want to use

     steps:
       - name: Checkout repo
         uses: actions/checkout@v2

       - name: Setup Node
         uses: actions/setup-node@v3
         with:
           node-version: ${{ matrix.node-version }}

       - name: Install dependencies
         run: npm install

       - name: Build project
         run: npm run build

       - name: Upload production-ready build files
         uses: actions/upload-artifact@v2
         with:
           name: production-files
           path: ./dist

   deploy:
     name: Deploy
     needs: build
     runs-on: ubuntu-latest
     if: github.ref == 'refs/heads/main'

     steps:
       - name: Download artifact
         uses: actions/download-artifact@v2
         with:
           name: production-files
           path: ./dist

       - name: Deploy to GitHub Pages
         uses: peaceiris/actions-gh-pages@v3
         with:
           github_token: ${{ secrets.GITHUB_TOKEN }}
           publish_dir: ./dist
This workflow consists of two jobs: build and deploy.
The build job installs dependencies and builds the project, while the deploy job uses the action to deploy the contents of the ./dist directory to GitHub Pages.
Commit the changes to your repository and push them to the main branch.
 git add .
 git commit -m "Add GitHub Actions workflow for automatic deployment"
 git push origin main
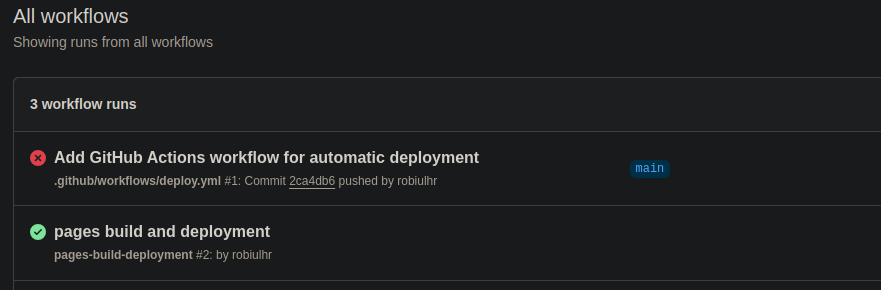
After running all the commands above, we can see our directory files on GitHub.
In the repository, proceed to the Actions tab. Click on the recent workflow.
you might notice that it failed initially due to missing permissions.
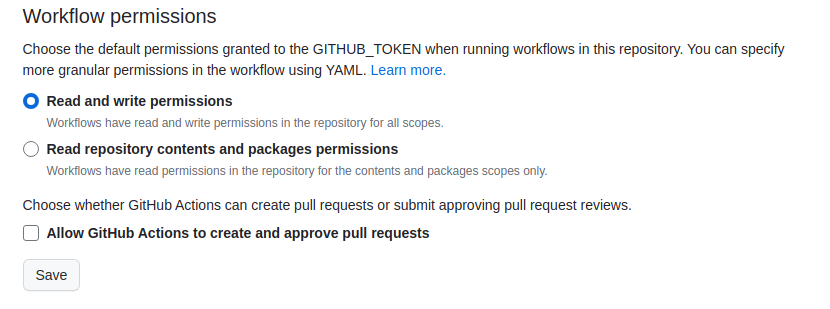
Since our action modifies the repository, it requires write permissions.
To resolve this, Navigate to Actions Settings, Select Read and Write permissions, and Hit Save.
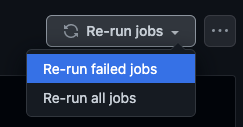
Now, check the status of your workflows. Go to Actions, and verify if the workflows have been executed successfully. If not, click on the failed workflow name. Inside the page, on the top-right section, you'll find an option to re-run the job.
A successfully executed workflow will appear like this:

Now, with every update to your project, GitHub Actions will automatically build and deploy your React project to GitHub Pages, keeping your live demo up to date.
To deploy your Vite React app on Vercel, begin by creating a new account. You can easily log in using OAuth.
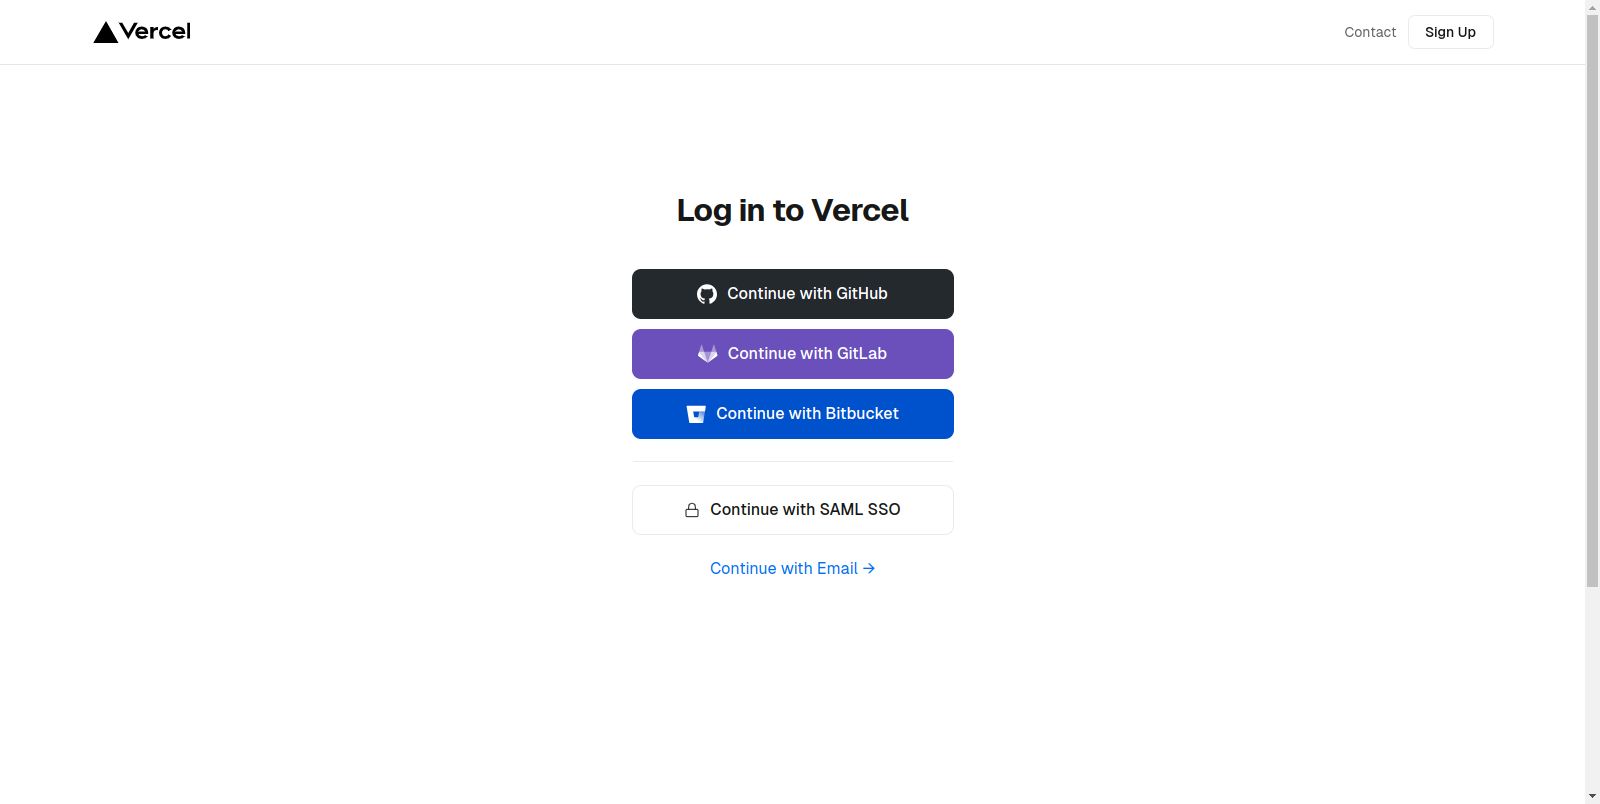
Once logged in successfully, you'll land on the Vercel dashboard.
Import the project from the Git repository. If it's your first time using Vercel, you'll be prompted to install it for GitHub. Click "Install Now For GitHub" and follow the instructions. Save the settings for GitHub.
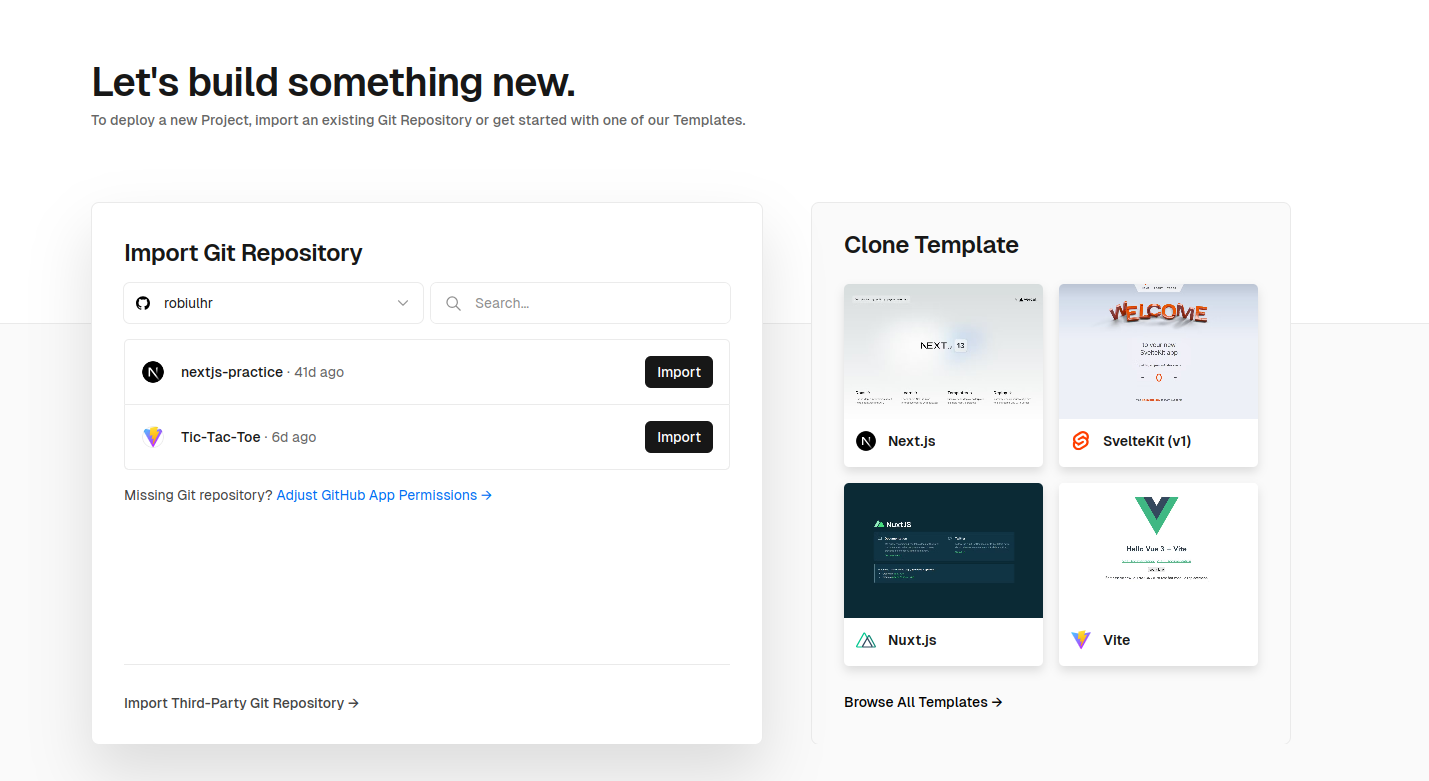
Navigate back to the import Git page, and you'll see that your GitHub is now connected. Click "Import Project from GitHub.".
If you haven't given permission for your GitHub repo click on the 'Adjust GitHub App Permissions' to provide the necessary permission. This will open a popup and from this popup select the repo you want to deploy to give the Repository access and click save.
Now you will see your selected project repo on the 'Import Git Repository' section.
Click "Import" and you'll get a form to enter the project name, root directory, and Framework preset.
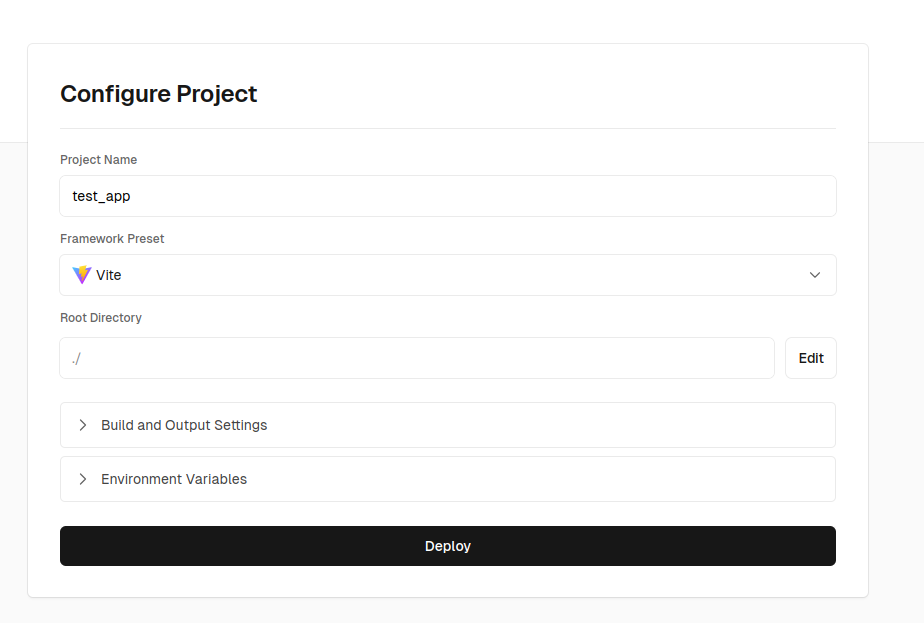
Make sure the Framework preset is selected as vite and the root directory is set to ./.
Add an environment variable with the key as VITE_BASE_PATH and the value as /.
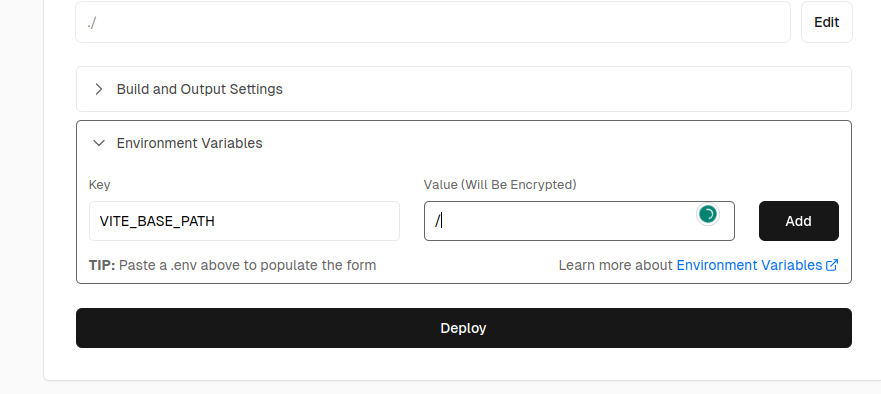
You can name it anything, but ensure it starts with VITE_ the preset. Leave other settings as default and click "Deploy."
Your React application will deploy within seconds, providing two to three preview links.
Even though we've completed the deployment process on Vercel, there's one more thing to address.
Since we've set the repository name as the basename in our vite.config.js file, we need to configure this dynamically. Otherwise, Vite will use the /repo-name URL instead of root URL /.
Inside the vite.config.js file, update the base URL with the following line:
base: process.env.VITE_BASE_PATH || '/deploy_react_app_github_pages_vercel',
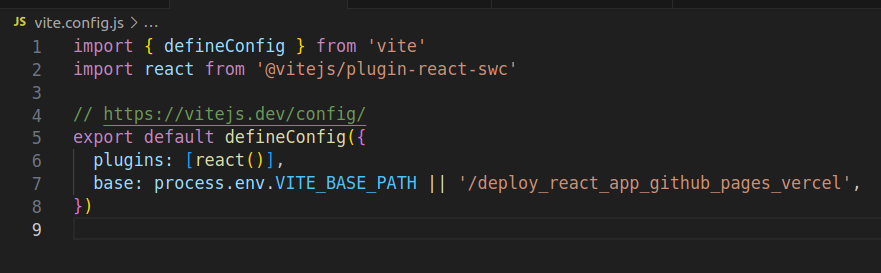
With these changes, you've dynamically configured the base URL for your Vite React app on Vercel.
After completing all the deployment steps, there's one more thing to address: making client-side routing work seamlessly on Vercel. Without this setup, if you navigate to a sub-route of your project and refresh the page, it won't work.
Let's fix this react router issue on Vercel by adding a configuration file.
vercel.json to the root directory of your project.Insert the following code into the vercel.json file:
  {
    "rewrites": [
      {
        "source": "/(.*)",
        "destination": "/index.html"
      }
    ]
  }
This configuration ensures that all routes lead to index.html, enabling proper client-side routing.
Note: As deployment processes on platforms like GitHub Pages and Vercel are subject to frequent updates, it's possible that the steps outlined here might differ when you execute them. If you encounter any difficulties deploying your project, kindly share the specific issues in the comments section.
For the most current and detailed information, consult the official Vercel documentation for deploying Vite applications: vite on vercel
With this setup, every time you push code to your repository, your project will be automatically deployed on both GitHub Pages and Vercel, providing a seamless and reliable deployment experience.
